
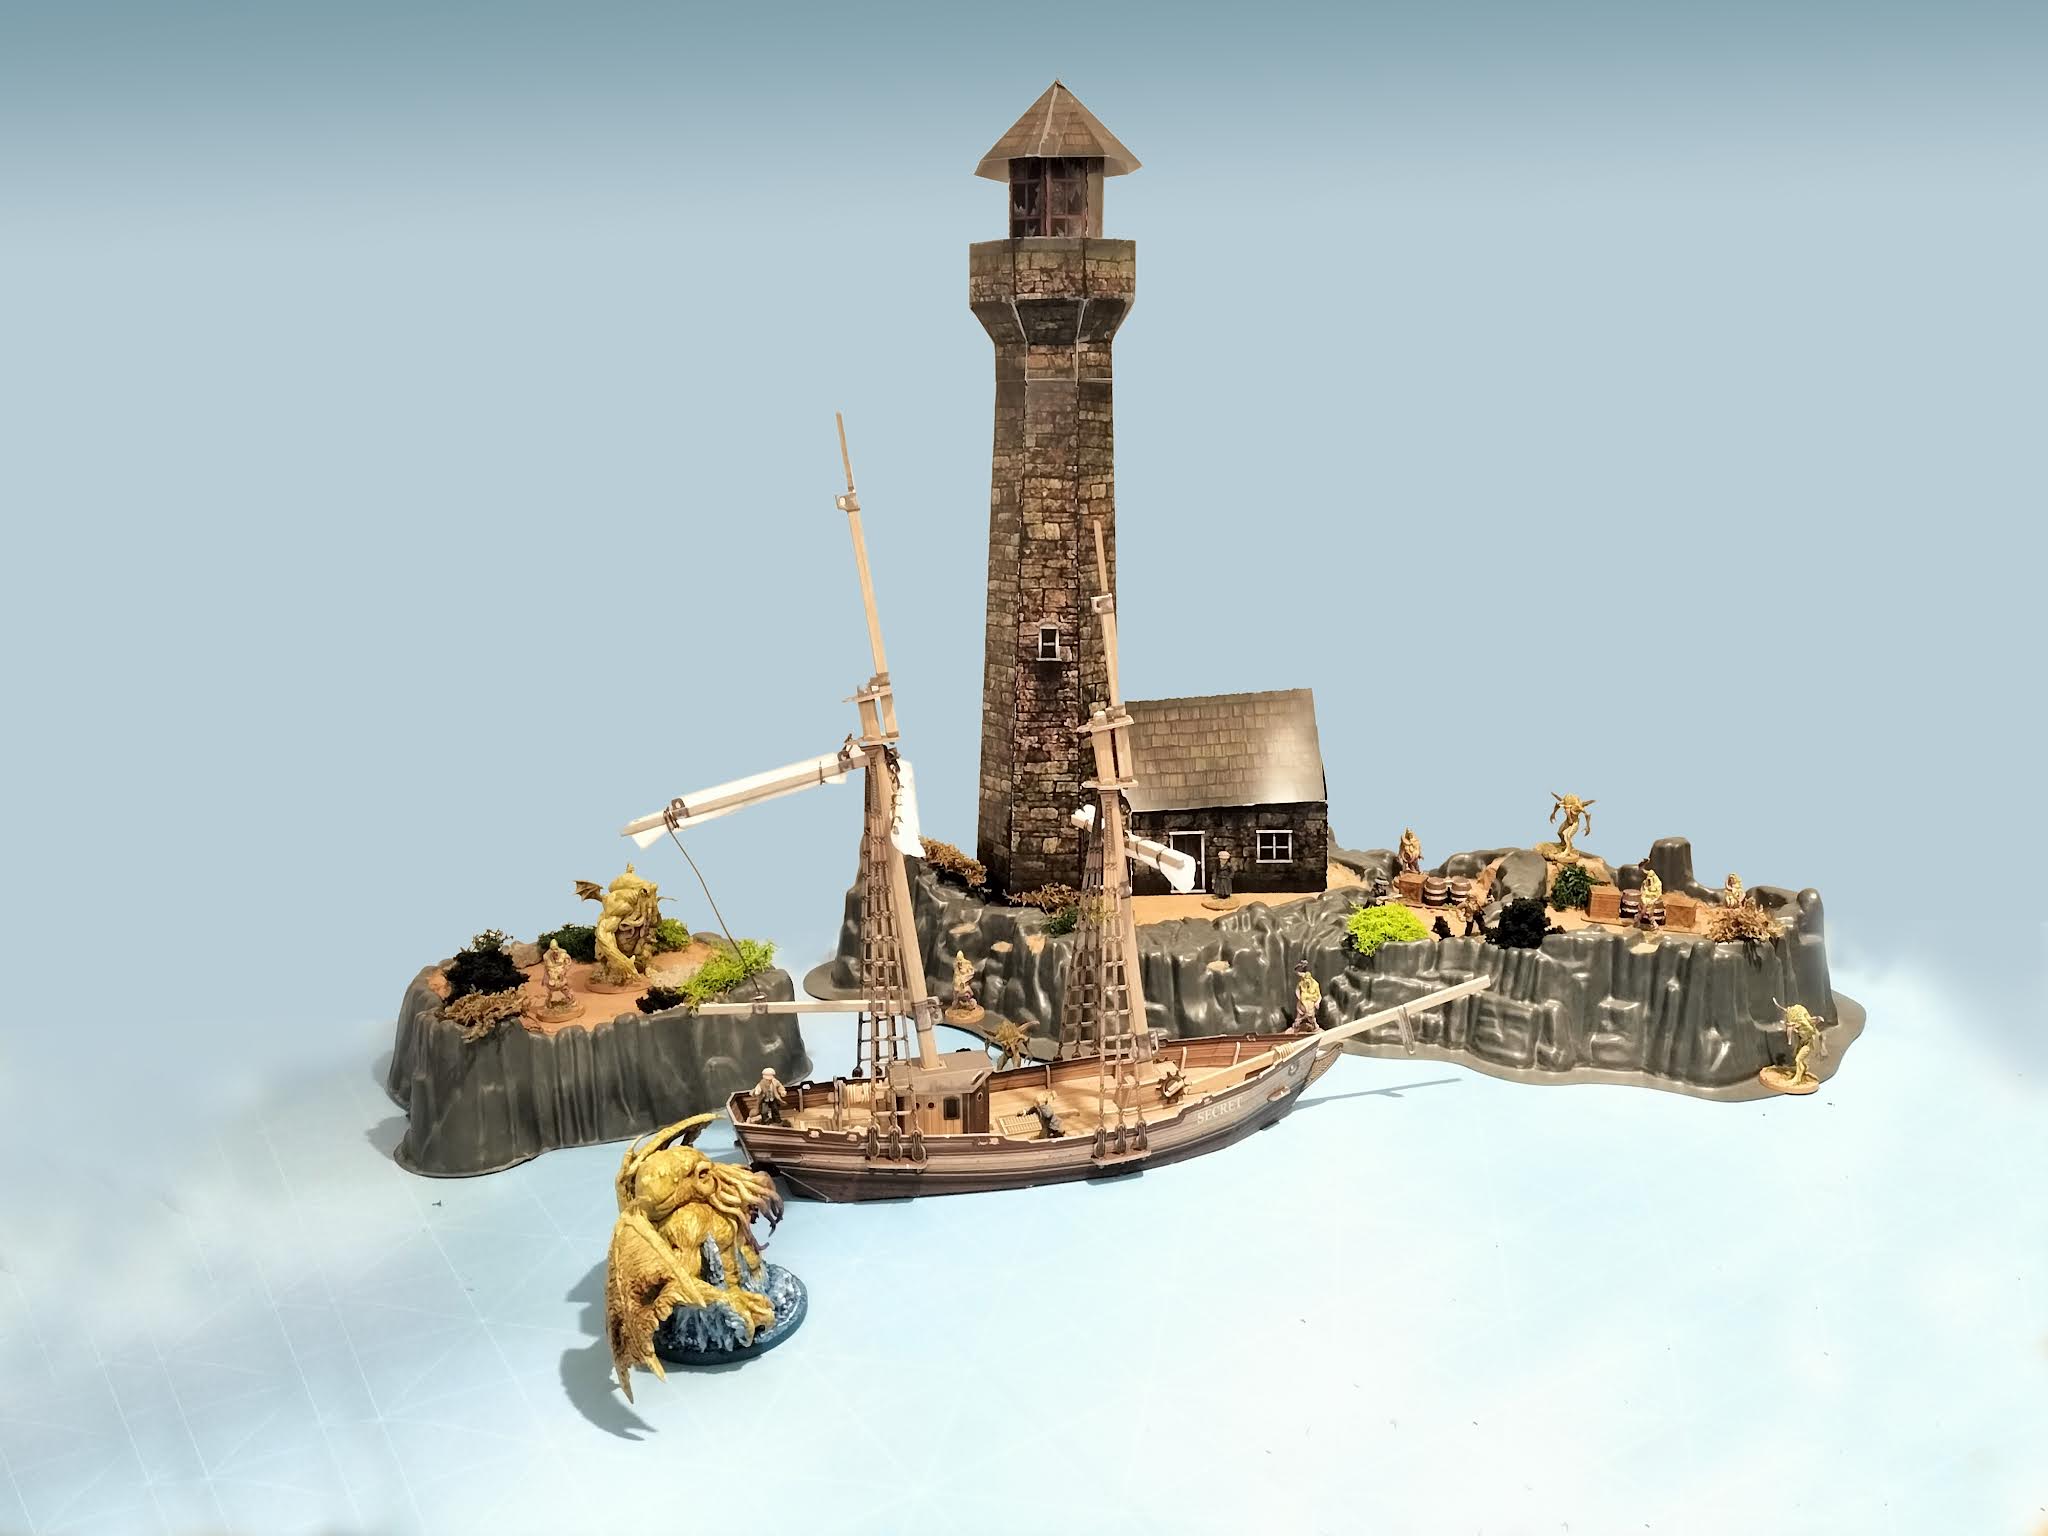
While working on a campaign for Fear of the Dark, I wanted one of the scenes to take place in an island with an old lighthouse.
While It could be an awesome scene, I didn't want to spend much money or take too much time to build the terrain.
In the end I decided to do the terrain on a budget, and I'm quite happy with how it turned out.

30€ is the total amount of money spent in these terrain pieces, and they were built fast as they are easy to make.
These terrain pieces, specially the islands and the ship are going to be used in many scenarios, as I think they are awesome terrain pieces.
After a few detailed pictures I'll explain how I did these pieces of terrain, and how you can do them on a budget.


THE ISLANDS
The islands were from a Gormiti toy set that I bought second hand for 5€. You may find it easily on second hand apps or websites, and they are really cheap if the figures that came with the toy set or any other parts are missing, which is quite usual when dealing with kids' toys.


I just covered the big holes with plastic sheets, put putty covering the joints and applied PVA and beach sand. Once dry just gave it one thick layer of brown Paint.
I know that I could have textured and painted the whole island, but it was going to take more time, and I wanted this piece of terrain cheap and fast... who knows? maybe in a future...


I want to cut the lower lip, so that it integrates more with the gaming mat, and it could be used as an island or as a mountain or a hill with a cliff.
THE LIGHTHOUSE
I wanted a big lighthouse, and big usually means expensive, so I decided to do it papercraft, as it is really cheap.
I searched the web looking for a nice papercraft lighthouse and after a while I found this one, which is really nice and looks dark and gloomy.
You can download the file as it is available for free from the ravensblight website, clicking in this LINK.
The papercraft model was small, and I wanted it really big and of course, that it could be fold down to be stored easily (as I showed in the post on papercraft terrain, which you may see clicking in this LINK).
After an hours of redesign on Photoshop, the model was 50 cms high and could be fold down (except for the top, which I wasn't able to redesign to fold down).
Printing was free as a friend printed for me in 320 grms A3 cardboard, but in any shop the cost would be 1'5€ per sheet (4'5€ the whole lighthouse).
It's a massive piece of terrain once displayed, but it takes no room at all when stored, and that is a MUST for me.


THE SHIP
Looking for terrain for a friend I found something surprising. It's a company (UMBUM or Clever Paper) that makes 3D cardboard model kits, mainly buildings but also a couple of ships.
I fonud one of the ships that according to the measures that appeared in the website it should be fine for 28mm miniatures, but it was a risk as it costed 25€.
You may see the Amazon link by clicking in this LINK.
At the end I decided to take the risk and ordered the ship, and ley me tell you that it was a blast: Easy to build, nice, tough and, unfortunately, just a bit out of scale.
It takes just about three hours to build it, and it is not difficult to build it following the instructions. It's a bit small for 28mm but it works and makes a delightful piece of terrain.
It came with a set of unfolded red sails, but I decided not to use those and make some folded white ordinary sails, as it would make easier to move the miniatures in the deck of the ship.


And this is it!
A post on cheap and easy to build terrain that you may use on your scenarios. I will be using them in the Fear of the Dark campaign that I'm making.
Hope to see your lighthouses and ships soon!
Those three items a *really* good, and, for what you got, and useable in multiple scenarios. Well done, and thanks for posting. :-)
ReplyDeleteThanks a lot!
DeleteI always try yo stay in the cheap side of the hobby.